- What We Offer
- Managed WordPress Hosting
- WooCommerce Hosting
- Enterprise Hosting
- Agency Hosting
- Blog Hosting
- Education Hosting
- Our Clientele
- Case Studies
- Testimonials
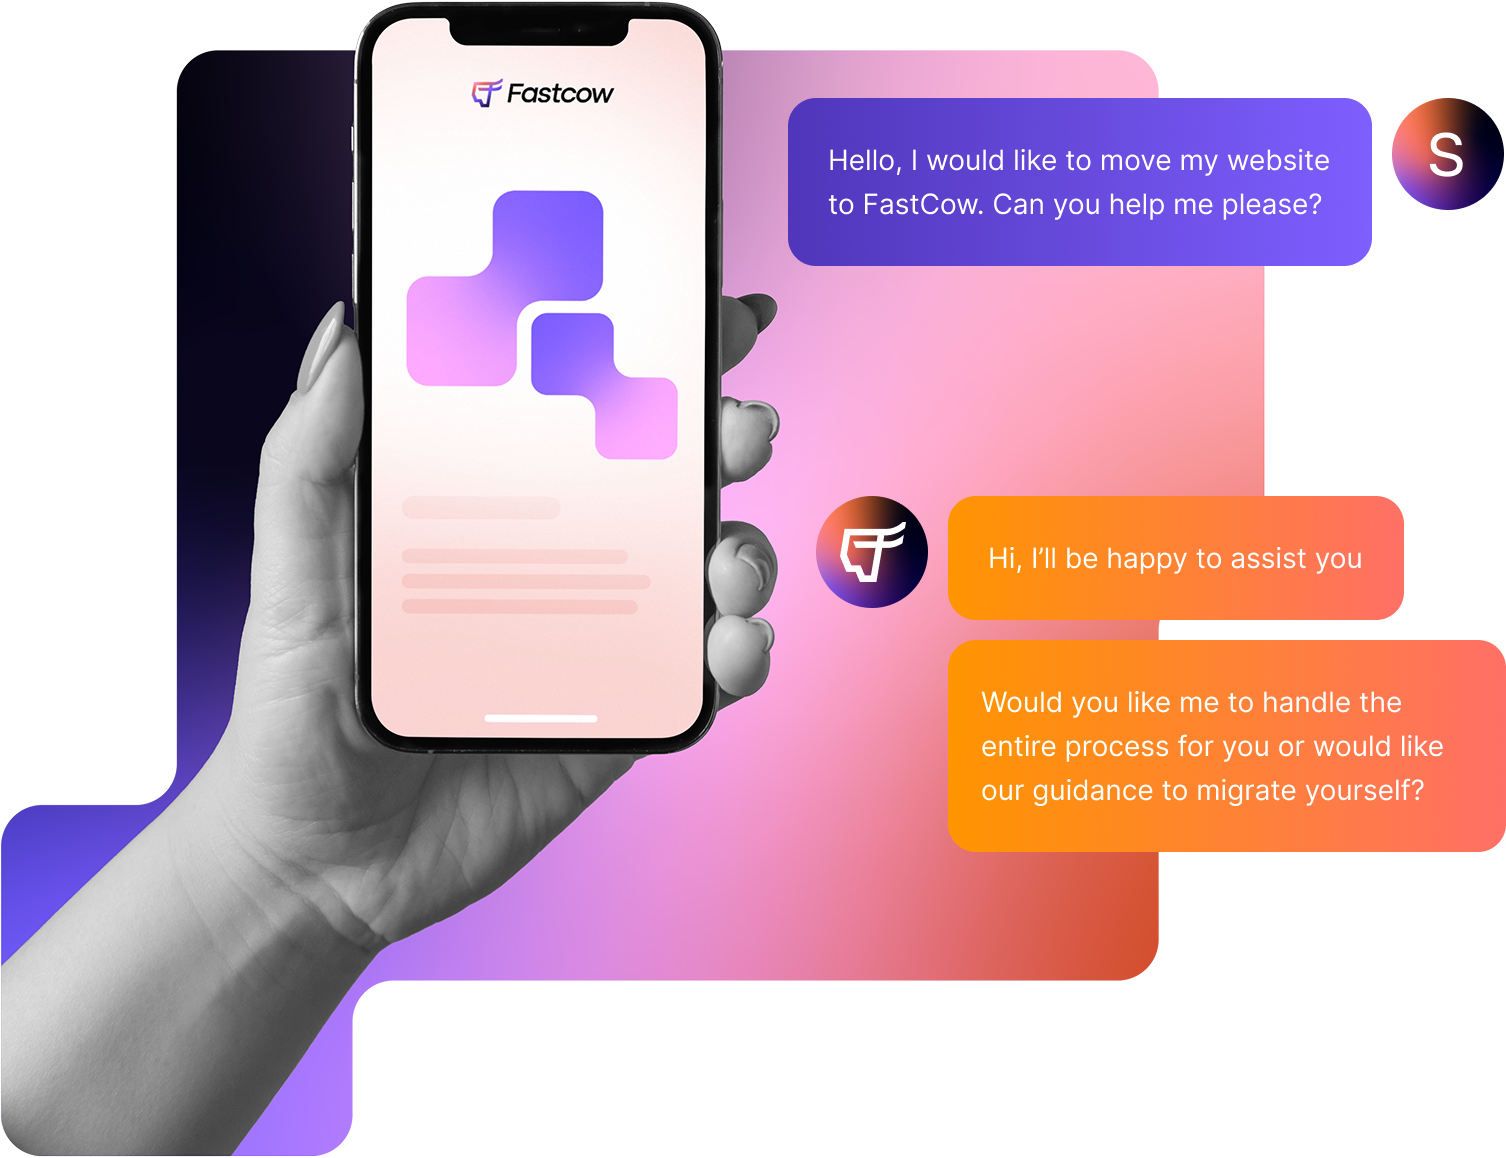
Book a Demo
Superior Services, Unmatched CDN Performance, Zero Downtime
- Know More
- About Fastcow
- Meet Our Team
- Careers
- Why Choose FastCow
"Website without visitors is like a ship lost in the horizon. And we turn that ship into a yacht"
Ammar AhmedDev Ops & Sys Admin
0203 229 5014
646 564 5632
Our Clientele
Book a Demo
Superior Services, Unmatched CDN
Performance, Zero Downtime
Unique Features
- Speed
- Reliability
- Trust
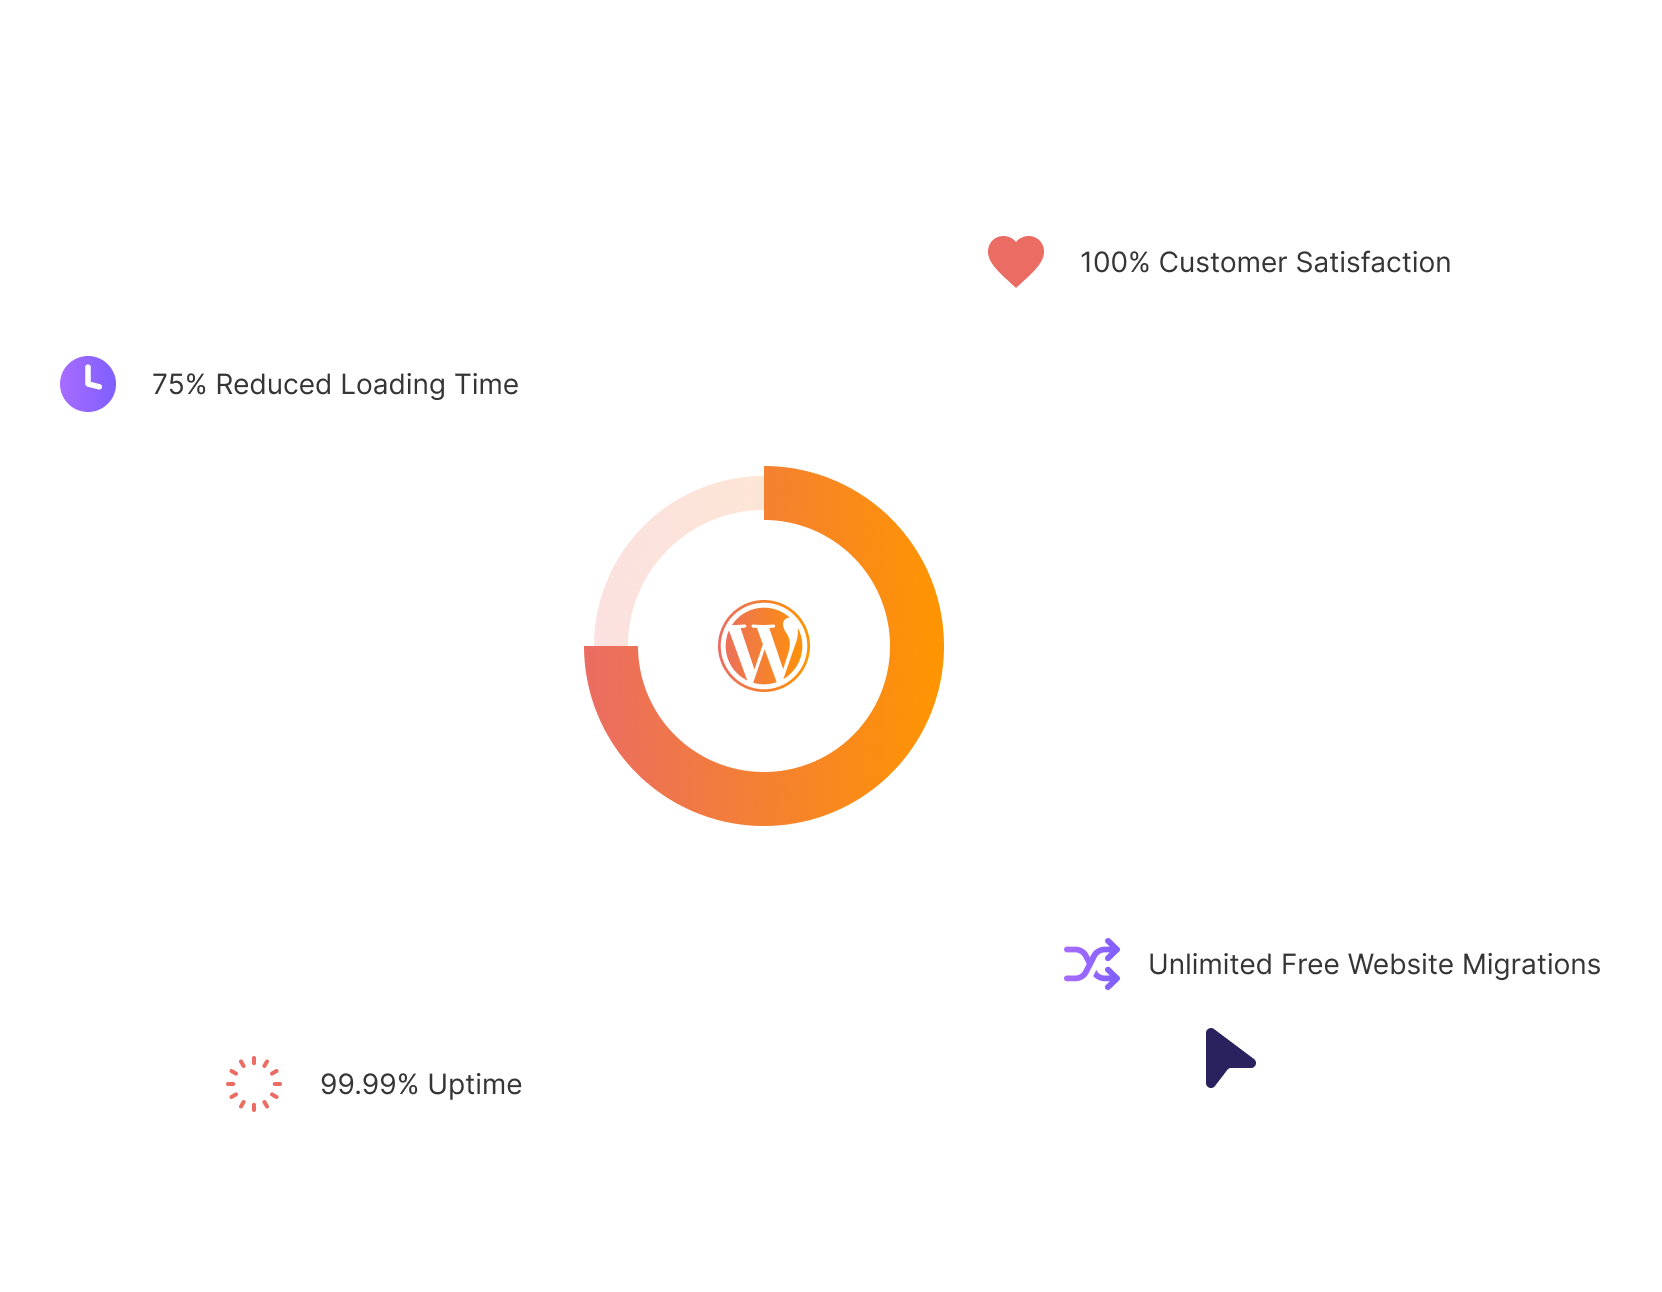
48%Faster
DecreasedLoading Times
BigBlueMail achieves 48% Faster
Loading Times
About Us
"Website without visitors is like a
ship lost in the horizon. And we
turn that ship into a yacht"
Ammar AhmedDev Ops & Sys Admin